-
리눅스(우분투) 명령어 정리TOOL/터미널 2021. 11. 27. 14:10
2020.05
$ ls → 파일 목록확인 (== C:\Users\Student>dir)
tmth@ubuntu:~$ ls
Desktop Documents Downloads Music Pictures Public Templates Videos
$ cd (디렉토리 명) → Change Directory( 디렉토리 변경 * 대소문자 구분)
tmth@ubuntu:~$ cd Documents/
tmth@ubuntu:~/Documents$ ls
$ sudo → 슈퍼유저(root) 계정의 권한으로 명령 실행
tmth@ubuntu:~/Documents$ sudo passwd → 패스워드 변경(일반 사용자 → passwd)
[sudo] password for tmth:
New password:
Retype new password:
passwd: password updated successfully
tmth@ubuntu:~/Documents$ whoami → 현재 로그인 된 계정 정보 확인
tmth@ubuntu:~/Documents$ su root → root계정으로 사용자 계정 변경 ( su + 사용자명 )
Password:
root@ubuntu:/home/tmth/Documents# → 일반 사용자 ($) / root계정 (#)
root@ubuntu:/home/tmth/Documents# whoami
root
# adduser 계정명 → 새로운 사용자 계정 등록
root@ubuntu:/home/tmth/Documents# adduser test
Adding user `test' ...
Adding new group `test' (1001) ...
Adding new user `test' (1001) with group `test' ...
Creating home directory `/home/test' ...
Copying files from `/etc/skel' ...
New password:
Retype new password:
passwd: password updated successfully
Changing the user information for test
Enter the new value, or press ENTER for the default
Full Name []:
Room Number []:
Work Phone []:
Home Phone []:
Other []:
Is the information correct? [Y/n] Y
root@ubuntu:/home/tmth/Documents# su test
test@ubuntu:/home/tmth/Documents$ whoami
디렉토리 관리
/ → 절대경로
./ → 상대경로(현재 위치)
../ → 상대경로(상위 디렉토리(이전 위치))
tmth@ubuntu:~$ ls
Desktop Documents Downloads Music Pictures Public Templates Videos
tmth@ubuntu:~$ pwd → Present Working Directory 현재 디렉토리 위치 확인
/home/tmth
tmth@ubuntu:~$ cd ./
tmth@ubuntu:~$ pwd
/home/tmth → 현재 위치로 change Directory 해도 아무런 변화 없음
tmth@ubuntu:~$ cd ../
tmth@ubuntu:/home$ pwd
/home → 현재 위치의 한 단계 상위 단계인 home으로 이동
tmth@ubuntu:/home$ ls
test tmth → home 밑에 생성 된 계정 모두 확인 가능
/home/tmth/Downloads
tmth@ubuntu:~/Downloads$ cd ../../ → ../ 활용하여 두 단계 상위 단계로 이동
tmth@ubuntu:/home$ pwd
/home
/
tmth@ubuntu:/$ cd ~/ → $ cd ~/이용 시 어느 위치에서든 자신 계정의 최상위로 이동
tmth@ubuntu:~$ pwd
/home/tmth
tmth@ubuntu:~$ ls
Desktop Documents Downloads Music Pictures Public Templates Videos
tmth@ubuntu:~$ ls -a → 숨김파일 모두 확인 가능(.으로 시작 시 Hidden File)
. .bashrc Documents .mozilla Public Videos
.. .cache Downloads Music .ssh
.bash_history .config .gnupg Pictures .sudo_as_admin_successful
.bash_logout Desktop .local .profile Templates
tmth@ubuntu:~$ ls -l → 파일이나 디렉토리의 세부 정보 확인 가능
total 32
drwxr-xr-x 2 tmth tmth 4096 May 11 00:31 Desktop
drwxr-xr-x 2 tmth tmth 4096 May 11 00:31 Documents
drwxr-xr-x 2 tmth tmth 4096 May 11 00:31 Downloads
drwxr-xr-x 2 tmth tmth 4096 May 11 00:31 Music
drwxr-xr-x 2 tmth tmth 4096 May 11 17:14 Pictures
drwxr-xr-x 2 tmth tmth 4096 May 11 00:31 Public
drwxr-xr-x 2 tmth tmth 4096 May 11 00:31 Templates
drwxr-xr-x 2 tmth tmth 4096 May 11 00:31 Videos
사용자 권한
타입 해당 유저의 권한 헤당 유저 그룹 권한 기타(다른 그룹 등) -(파일) rwx(읽기,쓰기,실행) r-x(읽기, 실행) --x(실행) d(디렉토리) rw- (읽기, 쓰기) rwx(읽기,쓰기,실행) --- -rw-rw-r-- 1 tmth tmth 0 May 11 19:18 test
→ 파일, 해당 유저 읽기,쓰기 가능, 그룹 읽기만 가능, 기타 읽기만 가능(현재 실행 불가능)
drwxr-xr-x 2 tmth tmth 4096 May 11 00:31 Videos
→ 디렉토리, 해당 유저 읽기,쓰기,실행 가능, 그룹 관한 읽기, 실행 가능, 기타 읽기, 실행 가능
2 tmth tmth 4096 May 11 00:31 Videos 참조 권한 참조 횟수 사용자 아이디 그룹 아이디 크기 생성 월 일 생성시간 파일 이름
tmth@ubuntu:~$ ls -lh → 파일 용량 확인 가능
total 32K
drwxr-xr-x 2 tmth tmth 4.0K May 11 00:31 Desktop
drwxr-xr-x 2 tmth tmth 4.0K May 11 00:31 Documents
drwxr-xr-x 2 tmth tmth 4.0K May 11 00:31 Downloads
drwxr-xr-x 2 tmth tmth 4.0K May 11 00:31 Music
drwxr-xr-x 2 tmth tmth 4.0K May 11 17:14 Pictures
drwxr-xr-x 2 tmth tmth 4.0K May 11 00:31 Public
drwxr-xr-x 2 tmth tmth 4.0K May 11 00:31 Templates
-rw-rw-r-- 1 tmth tmth 0 May 11 19:18 test
drwxr-xr-x 2 tmth tmth 4.0K May 11 00:31 Videos
tmth@ubuntu:~$ ls -i → 파일 노드 번호 확인 가능
263050 Desktop 263055 Music 263052 Templates
263054 Documents 263056 Pictures 133197 test
263051 Downloads 263053 Public 263057 Videos
tmth@ubuntu:~$ ls -ahi → 숨겨진 파일까지 노드번호 확인 가능
160960 . 263054 Documents 263053 Public
131073 .. 263051 Downloads 263470 .ssh
131707 .bash_history 263031 .gnupg 133196 .sudo_as_admin_successful
160962 .bash_logout 263004 .local 263052 Templates
160961 .bashrc 264222 .mozilla 133197 test
263009 .cache 263055 Music 263057 Videos
263007 .config 263056 Pictures
263050 Desktop 160963 .profile
tmth@ubuntu:~$ ls -alhi →숨김 파일 및 파일 세부 정보, 노드 번호, 용량까지 출력
total 80K
160960 drwxr-xr-x 16 tmth tmth 4.0K May 11 19:18 .
131073 drwxr-xr-x 4 root root 4.0K May 11 18:18 ..
131707 -rw------- 1 tmth tmth 283 May 11 19:10 .bash_history
160962 -rw-r--r-- 1 tmth tmth 220 May 11 00:27 .bash_logout
160961 -rw-r--r-- 1 tmth tmth 3.7K May 11 00:27 .bashrc
263009 drwx------ 14 tmth tmth 4.0K May 11 00:36 .cache
263007 drwxr-xr-x 12 tmth tmth 4.0K May 11 01:41 .config
263050 drwxr-xr-x 2 tmth tmth 4.0K May 11 00:31 Desktop
263054 drwxr-xr-x 2 tmth tmth 4.0K May 11 00:31 Documents
263051 drwxr-xr-x 2 tmth tmth 4.0K May 11 00:31 Downloads
263031 drwx------ 3 tmth tmth 4.0K May 11 00:56 .gnupg
263004 drwxr-xr-x 3 tmth tmth 4.0K May 11 00:31 .local
264222 drwx------ 5 tmth tmth 4.0K May 11 00:36 .mozilla
263055 drwxr-xr-x 2 tmth tmth 4.0K May 11 00:31 Music
263056 drwxr-xr-x 2 tmth tmth 4.0K May 11 17:14 Pictures
160963 -rw-r--r-- 1 tmth tmth 807 May 11 00:27 .profile
263053 drwxr-xr-x 2 tmth tmth 4.0K May 11 00:31 Public
263470 drwx------ 2 tmth tmth 4.0K May 11 00:56 .ssh
133196 -rw-r--r-- 1 tmth tmth 0 May 11 17:33 .sudo_as_admin_successful
263052 drwxr-xr-x 2 tmth tmth 4.0K May 11 00:31 Templates
133197 -rw-rw-r-- 1 tmth tmth 0 May 11 19:18 test
263057 drwxr-xr-x 2 tmth tmth 4.0K May 11 00:31 Videos
tmth@ubuntu:~/Public$ touch test1 → touch (파일명) : 파일 생성
tmth@ubuntu:~/Public$ ls
test1
tmth@ubuntu:~/Public$ su root
Password:
root@ubuntu:/home/tmth/Public# cp test1 test2 → cp (원본파일) (새로운 파일 명)
root@ubuntu:/home/tmth/Public# ls
test1 test2
-rw-rw-r-- 1 tmth tmth 0 May 18 18:23 test1
-rw-r--r-- 1 root root 0 May 18 18:24 test2 → test1과 test2파일의 소유자가 각각 다름
root@ubuntu:/home/tmth/Public# cp -p test1 test3 → cp -p 원본 소스 파일 소유주로 파일 복사
root@ubuntu:/home/tmth/Public# ls
test1 test2 test3
root@ubuntu:/home/tmth/Public# ls -l
total 0
-rw-rw-r-- 1 tmth tmth 0 May 18 18:23 test1
-rw-r--r-- 1 root root 0 May 18 18:24 test2
-rw-rw-r-- 1 tmth tmth 0 May 18 18:23 test3 → cp -p로 root계정에서 test1 복사 시 tmth가 소유주
tmth@ubuntu:~/Public$ touch test
tmth@ubuntu:~/Public$ ls
test test1 test2 test3
tmth@ubuntu:~/Public$ rm test → rm 파일명 : 해당 파일 삭제
tmth@ubuntu:~/Public$ ls
test1 test2 test3
Desktop Documents Downloads log log2 Music Pictures Public Templates test Videos
tmth@ubuntu:~$ mv test ./Public/ → mv (파일명) ./디렉토리 명/ : 파일 이동
tmth@ubuntu:~$ ls
Desktop Documents Downloads log log2 Music Pictures Public Templates Videos
tmth@ubuntu:~$ cd Public/
tmth@ubuntu:~/Public$ ls
test test1 test2 test3
tmth@ubuntu:~/Public$ ls
kkk kkk1 kkk3 kkk4 log3 test1 test2 test3
tmth@ubuntu:~/Public$ mv log3 ../ → log3 파일을 상위 폴더로 mv(move)
tmth@ubuntu:~/Public$ ls
kkk kkk1 kkk3 kkk4 test1 test2 test3
tmth@ubuntu:~/Public$ ls ../
Desktop Downloads log log3 Music Public Videos
tmth@ubuntu:~/Public$ ls ../ → 이전 상위 폴더의 파일리스트 출력
tmth@ubuntu:/$ ls / → 최상위 단계의 파일리스트 출력(어느 위치에서든)
bin dev lib libx32 mnt root snap sys var
boot etc lib32 lost+found opt run srv tmp
cdrom home lib64 media proc sbin swapfile usr
== 위와 아래가 동일한 명령임
tmth@ubuntu:/$ pwd
/
tmth@ubuntu:/$ ls
bin dev lib libx32 mnt root snap sys var
boot etc lib32 lost+found opt run srv tmp
cdrom home lib64 media proc sbin swapfile usr
tmth@ubuntu:~/Public$ cp kkk1 ../kkk2 → kkk1 파일을 상위폴더에 kkk2라는 이름으로 카피
tmth@ubuntu:~/Public$ ls
kkk kkk1 test test1 test2 test3 → Public 폴더에는 kkk2파일 생성X
tmth@ubuntu:~/Public$ cd ../
tmth@ubuntu:~$ ls -l
total 32
drwxr-xr-x 2 tmth tmth 4096 May 11 00:31 Desktop
drwxr-xr-x 2 tmth tmth 4096 May 11 00:31 Documents
drwxr-xr-x 2 tmth tmth 4096 May 11 00:31 Downloads
-rw-rw-r-- 1 tmth tmth 0 Jun 1 17:23 kkk2 → Public의 상위폴더에 kkk2 생성 됨
tmth@ubuntu:~$ cd Public/
tmth@ubuntu:~/Public$ cp ../kkk2 kkk3 → 상위폴더의 kkk2 파일을 kkk3라는 이름으로 카피 (상대경로)
tmth@ubuntu:~/Public$ cp /home/tmth/kkk2 kkk4 → 상위폴더의 kkk2 파일을 kkk4로 카피(절대경로) tmth@ubuntu:~/Public$ ls -l
total 0
-rw-rw-r-- 1 tmth tmth 0 Jun 1 17:22 kkk
-rw-rw-r-- 1 tmth tmth 0 Jun 1 17:22 kkk1
-rw-rw-r-- 1 tmth tmth 0 Jun 1 17:25 kkk3 → 현재 폴더인 Public에 kkk3 생성
-rw-rw-r-- 1 tmth tmth 0 Jun 1 17:28 kkk4
root@ubuntu:/home/tmth/Public# exit → 슈퍼유저 계정에서 일반 계정(이전 사용자)으로 돌아가는 것
exit
tmth@ubuntu:~/Public$
tmth@ubuntu:~/Public$ mkdir room → MaKe DIRectory, 디렉토리 생성
tmth@ubuntu:~/Public$ cd room
tmth@ubuntu:~/Public/room$ ls
tmth@ubuntu:~/Public/room$ touch test
tmth@ubuntu:~/Public/room$ ls -l
-rw-rw-r-- 1 tmth tmth 0 Jun 1 18:39 test → Room 안에 만들어진 test파일
tmth@ubuntu:~/Public/room$ cd ../
tmth@ubuntu:~/Public$ ls
kkk kkk1 kkk3 kkk4 room test1 test2 test3
tmth@ubuntu:~/Public$ rmdir room → rmdir 디렉토리명 : 빈 디렉토리 삭제
rmdir: failed to remove 'room': Directory not empty → 디렉토리 안에 test파일이 존재하여 삭제 불가
tmth@ubuntu:~/Public$ rm -rf room
tmth@ubuntu:~/Public$ ls
kkk kkk1 kkk3 kkk4 test1 test2 test3
rm [옵션] 디렉토리명
-r 디렉토리와 그 하부 파일까지 삭제 (하부파일이 있는 디렉토리는 한번에 삭제불가)
-f 삭제 여부를 묻지 않고 바로 삭제
-rf 삭제 여부를 묻지 않으며 하부 파일이 있는 디렉토리까지 삭제tmth@ubuntu:~/Public$ cd room
tmth@ubuntu:~/Public/room$ rm test → room에서 직접 test 파일 삭제
mth@ubuntu:~/Public/room$ cd ../
tmth@ubuntu:~/Public$ rmdir room
tmth@ubuntu:~/Public$ ls
kkk kkk1 kkk3 kkk4 test1 test2 test3
Public 폴더에서 abc폴더 생성 -> abc폴더 안에 abc1폴더 생성 및 Public 폴더에 Hello 파일 생성 후 abc, abc1 폴더에 복사
tmth@ubuntu:~$ cd Public/
tmth@ubuntu:~/Public$ mkdir abc → MaKe DIRectory, 디렉토리 생성
tmth@ubuntu:~/Public$ cd abc
tmth@ubuntu:~/Public/abc$ mkdir abc1 → MaKe DIRectory, 디렉토리 생성
tmth@ubuntu:~/Public/abc$ cd abc1
tmth@ubuntu:~$ cd ../../
tmth@ubuntu:~/Public$ touch Hello
tmth@ubuntu:~/Public$ ls
abc Hello kkk kkk1 kkk3 kkk4 test1 test2 test3
tmth@ubuntu:~/Public$ cd abc
tmth@ubuntu:~/Public/abc$ cp ../Hello Hello → cp 원본파일경로 사본파일명
tmth@ubuntu:~/Public$ cp Hello ./abc → (Public폴더에서 생성 ) cp 복사할파일명 ./폴더명 tmth@ubuntu:~/Public/abc$ ls
abc1 Hello
tmth@ubuntu:~/Public/abc$ cd abc1
tmth@ubuntu:~/Public/abc/abc1$ cp ../../Hello Hello → cp 원본파일경로 사본파일명
tmth@ubuntu:~/Public$ cp Hello ./abc/abc1 → (Public폴더에서 생성 ) cp 복사할파일명 ./폴더명 tmth@ubuntu:~/Public/abc/abc1$ ls
Hello
> : 표준 출력을 파일로 저장하는 명령어
tmth@ubuntu:~$ echo "Hi! What a wonderful day." > log → echo “출력문구” > 저장파일명
tmth@ubuntu:~$ ls
Desktop Downloads log log3 Music Public Videos
Documents kkk2 log2 log4 Pictures Templates
tmth@ubuntu:~$ cat log → 파일 내용 출력(내용이 길 경우에도 한 번에 모든 내용 출력)
Hi! What a wonderful day.
tmth@ubuntu:~$ more log → 파일 내용 출력(내용이 길 경우 화면 크기만큼 출력&space로 다음 확인)
more로 긴 내용 확인 중 종료 원할 시에는 q 입력하면 종료 됨
Hi! What a wonderful day.
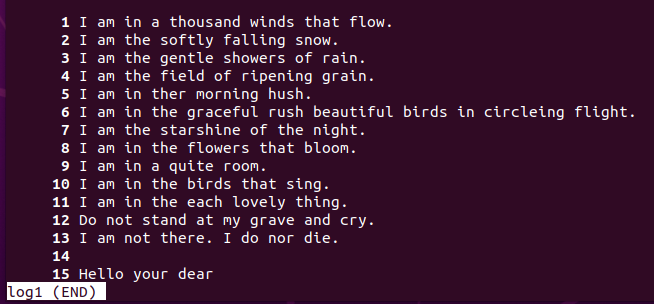
tmth@ubuntu:~$ cat > log1 → 기 생성 된 파일에 내용 입력
I am in a thousand winds that flow.
I am the softly falling snow.
I am the gentle showers of rain.
I am the field of ripening grain.
I am in ther morning hush.
I am in the graceful rush beautiful birds in circleing flight.
I am the starshine of the night.
I am in the flowers that bloom.
I am in a quite room.
I am in the birds that sing.
I am in the each lovely thing.
Do not stand at my grave and cry.
I am not there. I do nor die.
^C → 파일 입력 중단(저장) 시 Ctrl + C 입력
tmth@ubuntu:~$ ls -l
-rw-rw-r-- 1 tmth tmth 434 Jun 8 17:24 log1 → 파일용량 늘어난 것 확인 가능
tmth@ubuntu:~$ gedit log1 → gedit 파일명 : 파일 에디터로 해당 파일 열기

일반적인 메모장 에디터처럼 수정 후 저장 + 닫기 하면 됨
tmth@ubuntu:~$ vi log1 → vi 편집기로 해당 파일 열기

vi 편집기로 파일 OPEN → esc버튼으로 편집기능 활성화
→ 원하는 위치로 키보드를 이용하여 커서 위치를 옮기고, a(Append)버튼 클릭하여 추가기능 활성화
→ 원하는 문구 입력 → 다시 esc 버튼으로 편집기능 비활성화
→ :wq 입력하여 빠져나오기 (콜론(:)은 명령어 모드, wq는 Write Quit의 약자)
esc + yy 한 줄 복사 esc + p 붙여넣기 esc + dd 한 줄 삭제 esc + x 한 글자 삭제 esc + :q! 지금까지 작성한 내용 저장 없이 종료 tmth@ubuntu:~$ head -n4 log1 → head : 파일 내용 앞부분 -n: 출력라인수 옵션
I am in a thousand winds that flow.
I am the softly falling snow.
I am the gentle showers of rain.
I am the field of ripening grain. → log1파일의 4번째 줄까지 파일 내용 앞부분 출력 됨
tmth@ubuntu:~$ tail -n4 log1 → tail: 파일 내용 뒷 부분 -n: 출력라인수 옵션
Do not stand at my grave and cry.
I am not there. I do nor die.
Hello your dear → log1파일의 마지막에서 4번째 줄까지 파일 내용 뒷부분 출력 됨
tmth@ubuntu:~$ vi report → vi 새로운파일명으로 새로운 파일 생성도 가능함(작성법 동일)
tmth@ubuntu:~$ grep -n "I am" ./* → grep : 문자검색 / -n:라인 번호 출력 옵션 / ./* : 현재 위치의 모든 것
grep: ./Desktop: Is a directory
grep: ./Documents: Is a directory
grep: ./Downloads: Is a directory
./log1:1:I am in a thousand winds that flow.
./log1:2:I am the softly falling snow.
./log1:3:I am the gentle showers of rain.
./log1:4:I am the field of ripening grain.
./log1:5:I am in ther morning hush.
./log1:6:I am in the graceful rush beautiful birds in circleing flight.
./log1:7:I am the starshine of the night.
./log1:8:I am in the flowers that bloom.
./log1:9:I am in a quite room.
./log1:10:I am in the birds that sing.
./log1:11:I am in the each lovely thing.
./log1:13:I am not there. I do nor die.
grep: ./Music: Is a directory
grep: ./Pictures: Is a directory
grep: ./Public: Is a directory
grep: ./Templates: Is a directory
grep: ./Videos: Is a directory
tmth@ubuntu:~$ less -N log1 → 키보드를 이용해 줄 단위로 이동 가능한 화면 출력 방식
tmth@ubuntu:~$ find ./ -name "log*" -print → 현재폴더에서 이름이 log로 시작하는모든 것을 찾아 화면에 프린트
./log2
./log3
./.local/share/keyrings/login.keyring
./log1
./log
./log4
tmth@ubuntu:~$ find ./ -name "log*" -exec ls -l {} \; → 단순 프린트가 아닌 ls -l 실행(-exec)
{} \;는 find로 검색한 결과 파일을 읽는 인자의 위치
-rw-r--r-- 1 root root 0 May 18 18:22 ./log2
-rw-r--r-- 1 tmth tmth 0 Jun 1 17:31 ./log3
-rw------- 1 tmth tmth 105 May 11 00:31 ./.local/share/keyrings/login.keyring
-rw-rw-r-- 1 tmth tmth 451 Jun 8 18:20 ./log1
-rw-rw-r-- 1 tmth tmth 26 Jun 8 17:15 ./log
-rw-r--r-- 1 tmth tmth 0 Jun 1 17:32 ./log4
tmth@ubuntu:~$ ls -i
263050 Desktop 133198 log 133200 log4 148292 report
263054 Documents 147390 log1 263055 Music 263052 Templates
263051 Downloads 133199 log2 263056 Pictures 148294 test
133197 kkk2 300230 log3 263053 Public 263057 Videos
tmth@ubuntu:~$ find ./ -inum 148294 -exec rm {} \; → 노드 번호로 파일 검색 후 삭제하기
tmth@ubuntu:~$ ls -i
263050 Desktop 133197 kkk2 133199 log2 263055 Music 148292 report
263054 Documents 133198 log 300230 log3 263056 Pictures 263052 Templates
263051 Downloads 147390 log1 133200 log4 263053 Public 263057 Videos → 148294 파일 삭제 됨
tmth@ubuntu:~$ find ./ -type f -name "log*" -print → 타입이 f(file) 인 것 중 이름 검색하여 출력
./log2
./log3
./.local/share/keyrings/login.keyring
./log1
./log
./log4
-rw-rw-r-- 1 tmth tmth 451 Jun 8 18:20 log1
tmth@ubuntu:~$ chmod ugo+x log1 → x 권한 추가
-rwxrwxr-x 1 tmth tmth 451 Jun 8 18:20 log1
tmth@ubuntu:~$ chmod ugo-x log1 → x 권한 삭제
-rw-rw-r-- 1 tmth tmth 451 Jun 8 18:20 log1
tmth@ubuntu:~$ chmod o+r-w-x log1 → other에 r 권한 추가, w / x 권한 삭제
-rw-rw-r-- 1 tmth tmth 451 Jun 8 18:20 log1
root@ubuntu:/home/tmth# chown tmth.root deltest1 → 그룹 소유주를 root로 바꿈
root@ubuntu:/home/tmth# ls -l
-rw-rw-r-- 1 tmth root 0 Jun 11 17:40 deltest1
root@ubuntu:/home/tmth# chown root.root deltest2 → 소유주와 그룹 모두 root로 바꿈
-rw-rw-r-- 1 root root 0 Jun 11 17:40 deltest2
root@ubuntu:/home/tmth# chgrp tmth deltest2 → 그룹 소유주를 바꿈
-rw-rw-r-- 1 tmth root 9 Jun 11 18:53 deltest2
root@ubuntu:/home/tmth# chgrp tmth deltest2exir
-rw-rw-r-- 1 tmth tmth 9 Jun 11 18:53 deltest2
root@ubuntu:/home/tmth# id
uid=0(root) gid=0(root) groups=0(root)
tmth@ubuntu:~$ id
uid=1000(tmth) gid=1000(tmth) groups=1000(tmth), 4(adm),24(cdrom),27(sudo),30(dip),46(plugdev),120(lpadmin),131(lxd),132(sambashare)
test@ubuntu:/home/tmth$ id
uid=1001(test) gid=1001(test) groups=1001(test)
-rw-rw-r-- 1 tmth tmth 451 Jun 8 18:20 log1
tmth@ubuntu:~$ gzip log1 → 원본 파일 전체를 압축
-rw-rw-r-- 1 tmth tmth 249 Jun 8 18:20 log1.gz → 용량이 반 정도 줄고, log.gz(확장자)가 변경 됨
tmth@ubuntu:~$ gzip -d log1 → 압축해제
-rw-rw-r-- 1 tmth tmth 451 Jun 8 18:20 log1
tmth@ubuntu:~$ gzip -c log1 > log.gz → log1 원본파일을 그대로 두고, log.gz로 새로 압축파일 생성
-rw-rw-r-- 1 tmth tmth 451 Jun 8 18:20 log1
-rw-rw-r-- 1 tmth tmth 249 Jun 11 19:21 log.gz
tmth@ubuntu:~$ gzip -d -c log.gz > log3 → log.gz 압축파일을 log3 파일에 해제하여 덮어쓰기
tmth@ubuntu:~$ more log3
I am in a thousand winds that flow.
I am the softly falling snow.
I am the gentle showers of rain…~
tmth@ubuntu:~$ bzip2 -c log1 > log1.bz2 → 압축 알고리즘 용량으로 인해 압축 후 용량이 조금 더 큼
-rw-rw-r-- 1 tmth tmth 256 Jun 11 19:36 log1.bz2
tmth@ubuntu:~$ bzip2 -d -c log1.bz2 > log4 → log1.bz2 압축파일을 log4 파일에 해제하여 덮어쓰기
-rw-r--r-- 1 tmth tmth 451 Jun 11 19:39 log4
tmth@ubuntu:~$ dd if=/dev/zero of=log.img bs=4096 count=1000 → /dev/zero를 읽어
1000+0 records in outfile = log.img 파일 생성
1000+0 records out 파일 블록 사이즈는 4096
4096000 bytes (4.1 MB, 3.9 MiB) copied, 0.0159123 s, 257 MB/s 읽을 블록 개수 Count 설정
-rw-rw-r-- 1 tmth tmth 4096000 Jun 15 17:19 log.img
tmth@ubuntu:~$ dd if=/dev/zero of=test.img bs=4096 count=10000 → 자유롭게 설정 가능
10000+0 records in
10000+0 records out
40960000 bytes (41 MB, 39 MiB) copied, 0.0436897 s, 938 MB/s
-rw-rw-r-- 1 tmth tmth 40960000 Jun 15 17:19 test.img
tmth@ubuntu:~$ gzip -c log.img > log.gz
tmth@ubuntu:~$ bzip2 -c log.img > log.bz
-rw-rw-r-- 1 tmth tmth 48 Jun 15 17:24 log.bz → 원본파일 사이즈가 클수록 효과 있음
-rw-rw-r-- 1 tmth tmth 4011 Jun 15 17:24 log.gz
tmth@ubuntu:~$ bzip2 -c -d img.bz > test1.img → test1.img파일 생성 및 해당 파일에 덮어쓰기
-rw-rw-r-- 1 tmth tmth 4096000 Jun 15 17:30 test1.img
tmth@ubuntu:~/Public$ tar -cvf log.tar ./ → tar -cvf : tar 파일 생성
./
./test2
./kkk1
.
. (생략)
-rw-rw-r-- 1 tmth tmth 10240 Jun 15 17:51 log.tar
tmth@ubuntu:~/Public$ tar -tvf log.tar → tar -tvf : tar 파일 목록 출력
drwxr-xr-x tmth/tmth 0 2020-06-15 17:51 ./
-rw-r--r-- root/root 0 2020-05-18 18:24 ./test2
-rw-rw-r-- tmth/tmth 0 2020-06-01 17:22 ./kkk1
drwxrwxr-x tmth/tmth 0 2020-06-01 19:31 ./abc/
-rw-rw-r-- tmth/tmth 0 2020-06-01 19:31 ./abc/Hello
drwxrwxr-x tmth/tmth 0 2020-06-01 19:19 ./abc/abc1/
-rw-rw-r-- tmth/tmth 0 2020-06-01 19:19 ./abc/abc1/Hello
-rw-rw-r-- tmth/tmth 0 2020-06-01 17:22 ./kkk
-rw-rw-r-- tmth/tmth 0 2020-06-01 17:25 ./kkk3
-rw-rw-r-- tmth/tmth 0 2020-06-01 19:18 ./Hello
-rw-rw-r-- tmth/tmth 0 2020-05-18 18:23 ./test3
-rw-rw-r-- tmth/tmth 0 2020-05-18 18:23 ./test1
-rw-rw-r-- tmth/tmth 0 2020-06-01 17:28 ./kkk4
tmth@ubuntu:~/Public$ mkdir backup
tmth@ubuntu:~/Public$ cp log.tar ./backup → backup폴더에 log.tar파일 복사
tmth@ubuntu:~/Public$ cd backup/
tmth@ubuntu:~/Public/backup$ ls
log.tar
tmth@ubuntu:~/Public/backup$ tar -xvf log.tar → log.tar파일 안의 파일/디렉토리 복원
./
./test2
./kkk1
./abc/
./abc/Hello
./abc/abc1/
./abc/abc1/Hello
./kkk
./kkk3
./Hello
./test3
./test1
./kkk4
tmth@ubuntu:~/Public/backup$ ls
abc Hello kkk kkk1 kkk3 kkk4 log.tar test1 test2 test3
옵션명 의미 -c 아카이브 파일 생성 -x 생성 된 아카이브 파일 원래대로 복원 -f 아카이브 파일 이름 설정 -v 실행과정 출력 -t 아카이브 파일 목록리스트 출력 -j bzip2 알고리즘으로 압축 -z gzip 알고리즘으로 압축